Voip OCA
by Dixmit https://github.com/OCA/connector-telephony , Odoo Community Association (OCA) https://github.com/OCA/connector-telephonyVoip OCA
![]()
![]()
![]()
![]()
![]()
This module allows the use of VOIP directly from Odoo.
It relies on SIP.js to connect to the PBX using a websocket directly from the browser.
Odoo server will not connect directly to the PBX server, but will have users and passwords stored.
In order to use this module, you need to have a PBX server that allows websocket connection. Otherwise, you need to use a proxy that will be the bridge between Odoo and PBX. Websocket connection is required because browsers prefer this kind of connections. Also, this is an standard connection defined on RFC 7118 by IETF. Several PBX servers support this protocol.
Table of contents
Use Cases / Context
This module is intended to integrate directly with a VOIP Provider.
The provider need to supply a WebRTC system where we will plug on it.
Currently, it has been tested with:
- Zerovoz
- Ringover
Theoretically, it should work with
- Axivox
- OnSIP
Configuration
Create the PBX Connection
- Access in Debug mode.
- Go to Settings > Technical > Discuss > PBX Servers.
- Create a PBX server and define the domain name and websocket link.
You can set it as Test or Production. Test environment will never contact the PBX server.
Configure users
For each user, we need to define their PBX server, user and password if we want it to be able to access the PBX server and make calls. To do this, we have two options:
- Admin users can define the information directly in the user form for each user. For this, go to Settings > Users & Companies > Users and go to VOIP tab and set the information.
- By other hand, each user can go to Preferences and modify the information in the VOIP tab.
Usage
Automatically the system will login into the PBX server once we enter odoo with our user. If we are on a test environment, no login is made and the libraries of SIP are not loaded.
Once we are logged, we can use the VOIP widget in order to call directly. In order to open all the selectors, we can press the softphone button on the top bar…
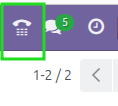
…and the bottom widget will be opened.
The widget can be hidden by clicking on the top bar.

Clicking the top bar of the widget again will make it reappear.
We can make a call in 2 ways:
- Clicking the partner’s number in the partner view, which appears in green. .. figure:: https://raw.githubusercontent.com/OCA/connector-telephony/18.0/voip_oca/static/description/partner.png
- Opening the numpad located at the bottom left of the widget, entering the desired number, and clicking the call button located at the bottom right of the widget. .. figure:: https://raw.githubusercontent.com/OCA/connector-telephony/18.0/voip_oca/static/description/numpad.png
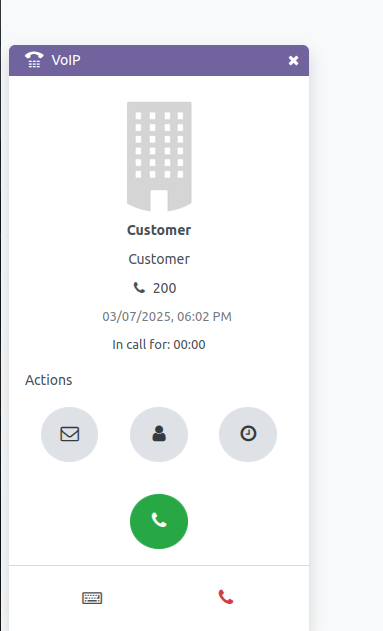
Inside a call, we can transfer the call, end the call, mute the call and put the call on Hold.
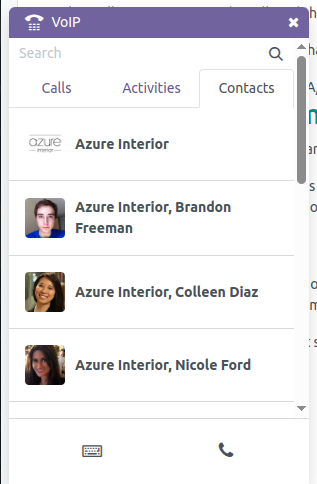
The widget offers 3 sections:
- Recent calls: Here we have a list of the last calls made, along with additional call information such as call date and time, status, or duration.
- Call Activities: Here we have a list of call activities assigned to us in any Odoo document(crm.lead, sale.order…) that has expired or is about to expire and needs to be completed.
- Contacts: Lastly, we have quick access to all stored partners in our Odoo who have a telephone number set.
Clicking on any record in these three sections gives us access to the related partner, allowing us to view their information and make a call.
In the partner view of the widget, we can perform three actions:
- Send an email to the partner.
- Access the partner’s form in Odoo.
- Schedule an activity.

If the partner is unknown and not stored in Odoo, some actions may not be available. This can occur when accessing a recent call made to a contact that is not stored for example. However, in this case, we allow the action to store the contact in Odoo from recent calls, clicking on the plus icon button.

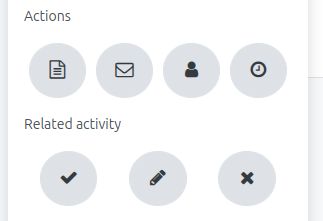
Additionally, if we access a contact through the activity section, we have four more available actions:
- Go to the related document, such as a lead or a sale.
- Mark the activity as done.
- Edit the activity.
- Cancel the activity.
In any tab, we can perform a search by typing a keyword in the search bar, such as the contact’s name or phone number.

Also, the system allows to receive call. In that case, the system will try to find the related partner and will open the widget automatically.
Known issues / Roadmap
The following options are interesting but are not implemented right now:
- Allow to enable or disable the VOIP as a user (Login / Logout)
- Create a call system where the calls are done automatically according to tasks
Not contempled behavior
We are not supporting setting two configuration for user. Not even a different configuration for company in the user.
Bug Tracker
Bugs are tracked on GitHub Issues. In case of trouble, please check there if your issue has already been reported. If you spotted it first, help us to smash it by providing a detailed and welcomed feedback.
Do not contact contributors directly about support or help with technical issues.
Credits
Authors
- Dixmit
Contributors
- Dixmit:
- Enric Alomar
- Luis Rodríguez
- Tecnativa:
- Carlos Roca
Other credits
The development of this module has been financially supported by:
- Associacion Española de Odoo (AEODOO)
The tones provided by default comes from Pixabay:
- Ringback tone: Sound Effect by freesound_community from Pixabay
- Call tone: Sound Effect by Jeremay Jimenez from Pixabay
- Dial tone: Sound Effect by freesound_community from Pixabay
Maintainers
This module is maintained by the OCA.
OCA, or the Odoo Community Association, is a nonprofit organization whose mission is to support the collaborative development of Odoo features and promote its widespread use.
Current maintainer:

This module is part of the OCA/connector-telephony project on GitHub.
You are welcome to contribute. To learn how please visit https://odoo-community.org/page/Contribute.
| Availability |
Odoo Online
Odoo.sh
On Premise
|
| Odoo Apps Dependencies |
Discuss (mail)
|
| Lines of code | 2044 |
| Technical Name |
voip_oca |
| License | AGPL-3 |
| Website | https://github.com/OCA/connector-telephony |
Please log in to comment on this module